Welcome to Phasmohentaia Walkthrough & Guide, which helps you to unlock all the events and scenes with all the available characters.
Foreword – Phasmohentaia Walkthrough & Guide
Word on the street is you kooky kids want a full in-depth step-by-step start-to-finish walkthrough. That is not this, and this is not that. Namely, because I’m literally Some Guy™, and am otherwise completely unaffiliated. I have literally no idea how the game works other than my own experiences, so if you’re reading this and still can’t find something, that sucks, man.
Introduction – Phasmohentaia Walkthrough & Guide
This walkthrough is really just a way to figure out what you need to do next and what content you may have missed. It’s not here to tell you what the “best” path or dialogue options are.
Ghost/Succubus Routes are pretty similar, so I won’t be differentiating between the two here, but as the game is updated I’ll note where the paths differ if applicable.
Prologue
The prologue plays like a standard VN (Visual Novel), where you make choices that affect certain outcomes. This part of the walkthrough will be fairly concise in telling you what choice leads to what.
Answering the Phone:
Phone Rings:
Answer the phone – Christie Love +1 (See: Apologize)
Ignore it – (See: Phone Vibrates)
Apologize:
I better fix this – Christie Love + 1, Submission + 1
I’m over it – Christie Love -1, Dominance + 1
Phone Vibrates:
Answer the phone- Matthew Love + 1
Ignore it – (Save before choosing this)
Remembering:
Remember? (Pt.1):
I need to remember.. – Player Corruption + 1
I don’t have time for this.. – (See: Heading to Christie)
Remember? (Pt.2):
I want to remember, damn the consequences – Player Corruption +2, Submission + 1, Times Raped +1, Succubus Love +1
This semen-demon isn’t fooling me, and I’ll probably avoid seeing something bad – Dominance +1, Player Corruption -1
Heading to Christie:
Maybe we can be more than friends – Christie Love +1
Let’s just keep it casual
Christie Meetup:
Yesterday?:
Wait, what exactly happened? – Christie Love + 1, Dominance + 1, Player Corruption +1
Just be civil tonight and let it go – Submission + 1
Dat Ass:
It’s in my genes to look – Dominance + 1, Player Corruption +1 (See: Dat Ass Pt.2)
Be a gentleman – Submission + 1
Dat Ass Pt.2:
Dat ass.. – Christie Love – 1, Dominance + 1, Player Corruption + 1
I better not push my luck, let’s just give a compliment instead – Christie Love + 1
Route Selection – Phasmohentaia Walkthrough & Guide
This is where you’ll choose your “companion” who you’ll be interacting with throughout your exploration of the main game. There are three companions to choose from:
Is that perfume I smell? It’s so intoxicating.. – Succubus Route (Optional Futa Content)
It just got way colder in here, there may be a ghost nearby. – Spirit Route
Why do I smell fire and brimstone? Demon Route (Optional M/M Content)
Succubus Route (Prologue): (Times Raped + 1 after choosing this route)
Turntables:
I just want this to be over.. – Succubus Love -1, Submission + 1
Let’s try to turn the tables on her – Succubus Love + 3, Dominance + 2, Player Corruption + 1
Spirit Route (Prologue):
Patience:
Let’s play it slowly, just in case. – Spirit Love + 1, Submission + 1
I don’t have time for this shit – Dominance +1
Chilly Cooter:
Wouldn’t be the weirdest thing I put my D into.. – Spirit Love + 1, Submission +1, Player Corruption + 1, Spirit Corruption +1
No, I’m not having sex with a Ghost! – Dominance +1
Compliments:
Why not? She might be dead, but it’s obvious she still has feelings. – Spirit Love + 1 (See: Beej)
I got my nut, now I need to get out of here. – Spirit Love -1, Spirit Corruption +1 (See: Dip?)
Beej:
For the sake of my balls, and all balls everywhere, I must cum. – Dominance +1, Spirit Corruption + 1
It’s the right thing to do. – Spirit Love +1, Player Corruption -1
Dip?
I’ll put my trust in her – Spirit Love +1 (See: Degeneracy)
Fk this, I’m going my own way – Not Implemented
Degeneracy:
Grab her hand – Spirit Love +1
Don’t grab her hand
Demon Route (Prologue):
Fight or Flight:
Grab the rock and wreck this demon’s shit – Content End
I mean this isn’t the worst thing to happen to me – Times Raped +1, Submission +1, Anus Development +1, Lost Anal Virginity, Player Corruption +1
Fight or Fk:
I’ll not be subjected to this any longer! – Dominance +1
Maybe if I throw my hips back, this will be over quickly.. – Times Raped + 1, Submission + 1, Anus Development +1, Player Corruption +1
Main Story – Phasmohentaia Walkthrough & Guide
The main story is in the form of an exploration/puzzle game. Find clues, talk to or run from the people you meet, and have an overall great time. This portion of the walkthrough will mainly be for showing you where all the items are in the current build. At the moment, there isn’t really a pressing need to have every line of dialogue and what those dialogue options do mapped out.
Note: This isn’t a “Scene Guide”. This is an utterly straightforward walkthrough for discovering items and unlocking areas. Following this will allow you to have access to scenes without you having to wonder “Am I missing an item?”
Finding All The Items
The Castle – Phasmohentaia Walkthrough & Guide
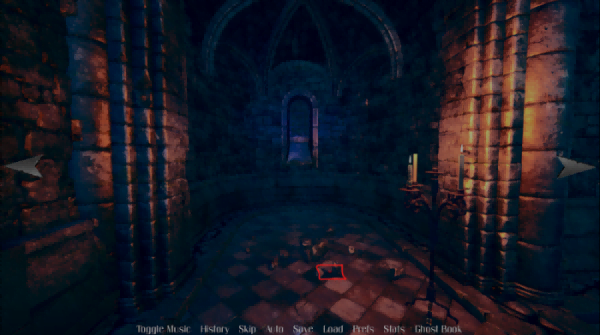
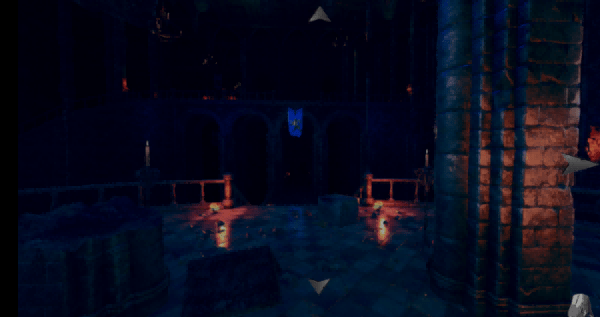
Lighter
From the scene below (this is where you start the main story), press the right arrow twice.

Once you reach the area below, pick up the lighter.
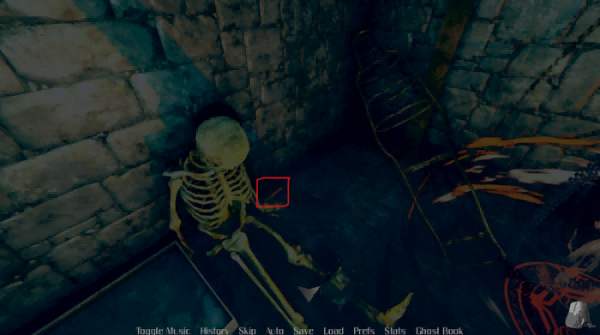
Hammer
From the scene below (starting area), go right once, forward twice, left once, then enter the door (if your companion makes you leave the room, just go back in)
Select “Examine the skeleton”, then click on the skeleton’s body to look closer. Pick up the hammer.
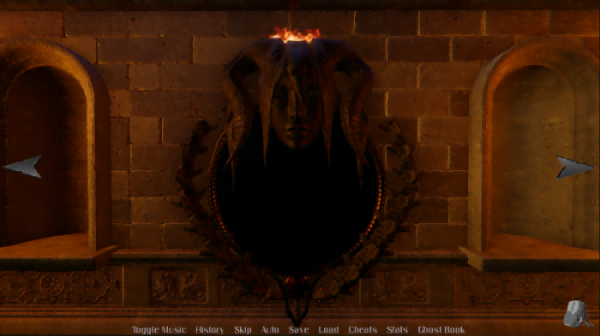
Black Gem (Requires- Hammer)
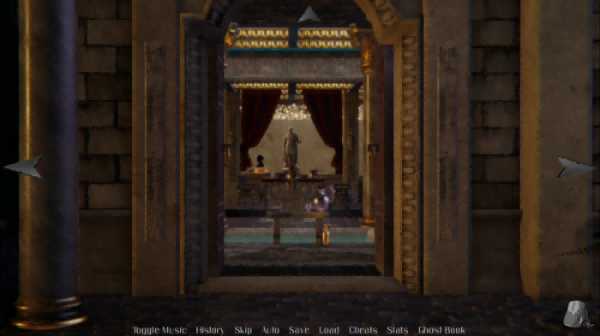
From the scene below (starting area), go forward once.

The first time you move forward, you’ll have no choice but to go back. Go forward again until you have the option to “Check the statue”. The statue is thicker than a bowl of oatmeal, but look at her hand and select the black gem.
The first time you select the gem, nothing will happen (progression-wise). Select it again. You can pick either dialogue option after this, but ultimately you’re going to select “‘Inspect’ the statue further”. How you proceed from here is up to you, but ultimately you retrieve the black gem.
Glowstick (Requires- Lighter, Black Gem)
From the scene below (starting area), go left. If you don’t have a left arrow, leave the area and come back, then go left.

Enter the portal, then enter the door (Make sure you have the lighter). Spooky. Now return back to the starting area. From the starting area, go right once, forward twice, then right again, and now once backwards (or twice left/right). Dance Dance Revolution. Now pick up the glowstick.
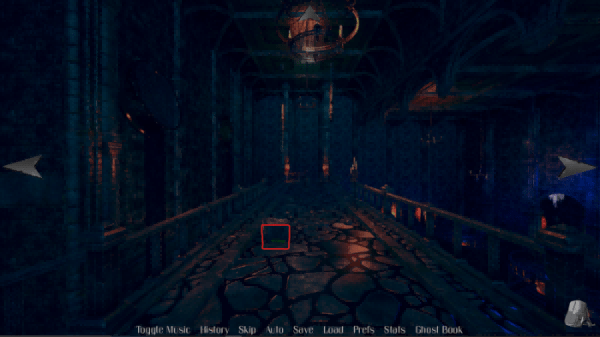
Ladder (Requires- Glowstick, Lighter, Black Gem)
From the scene below (starting area), head left, back into the portal.

Once again, enter the room. Don’t turn on your lighter. Approach the figure in the room. Don’t turn on your lighter. Click the ladder. Don’t turn on your lighter. Use the glowstick. Have your fun, but ultimately grab the ladder.
Room Key
Start from the scene below (starting area) and go backwards, turn right, and now forward.

You’ll reach a currently impassable door. Go backwards.Whose up there in that room at the top of the stairwell? Go back up the stairs and go backwards again. Hey, you got a key.
The Temple
There are, as of writing, no findable items in The Temple, so this is really just a placeholder.
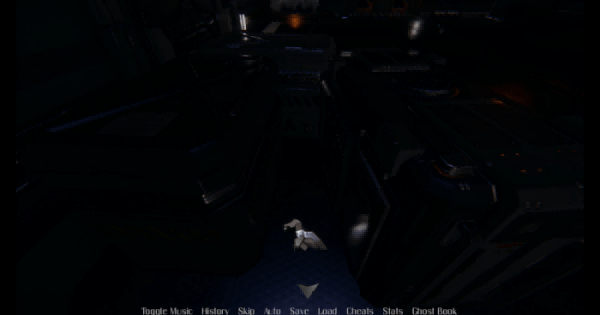
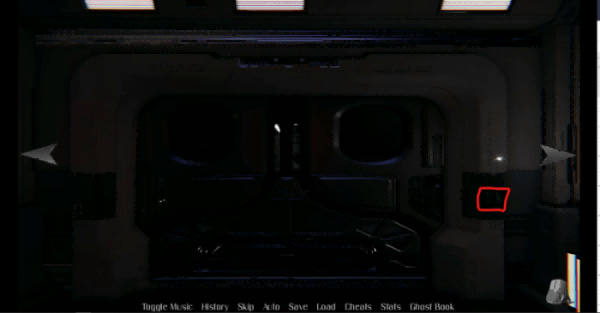
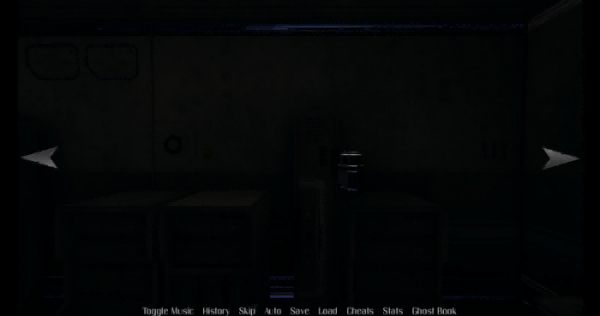
The Station
Get Fken spooked, kid. “Hey Plank these pictures are Fking dark”. Yes, Billy, the Fking area is dark. The lights are off. That’s the point. Like, if you follow the arrows and you legitimately can’t find the item in the screenshot then your shit is missing.
Boot (or something)
From the entrance portal of The Station, go ↑↑→↑→↑. Das Boot.
White Keycard
From the entrance of The Station (portal), go ↑→↑↑. Click the Little keypad to the right of the door.
Great. Now go ↑→↑←←↑↑→↑. Yes, you do have to go to the right first for the keycard to appear on the left. It’s a haunted ship, stranger things have happened.
Robo Hand
Guess where we’re starting. If you guessed “From the portal entrance to The Station”, you’d be right. From there, go ←↑←↑←↑→. Now you have obtained the Nintendo Power Glove, which you’re probably too young to know anything about.
Robo Hand Part 2: Electric Boogaloo
Yes, even robots have two hands. Taking it from the top, ←↑←↑↑↑↑↑.
A Leg of Some Sort
I don’t know, man. Honestly at this point starting from the entrance portal is kind of a pain in the ass but there’s only like one more item after this so I’ll deal. Anywho. ←↑←↑↑↑↑→↑↑↑→↑↑→↑↑→. There’s your leg. Kinda sus tbh.
Power Core (No, not that one)
You know the drill. ←↑←↑↑↑↑→↑↑↑→↑↑↑→↑↑←. You’ve got the touch. You’ve got the power.
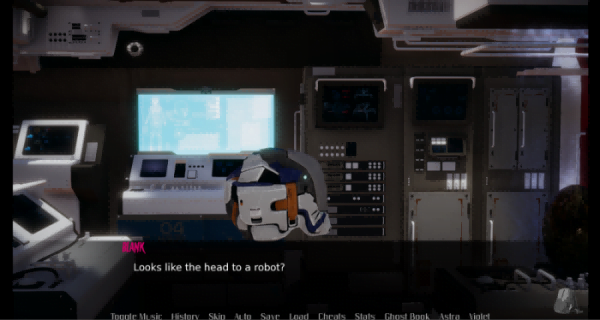
Robo Head
Maybe when all of this is done you’ll be the one getting some robo head, eh? Up top! I actually forgot if a BJ was an option for The Android and I’m not about to check. Okay so, remember that Med Bay looking room that you were sent to when you got attacked by The Hunter? No? Well…just go to the very end of the hallway in the direction of where you got attacked by her. Yup, just pass all the rooms and keep going, going, going until you get to a white door.
Alright now go inside the door and turn left twice, then move forward. (←←↑). You’ll automatically pick up the head. Now to assemble your Bad Bot!
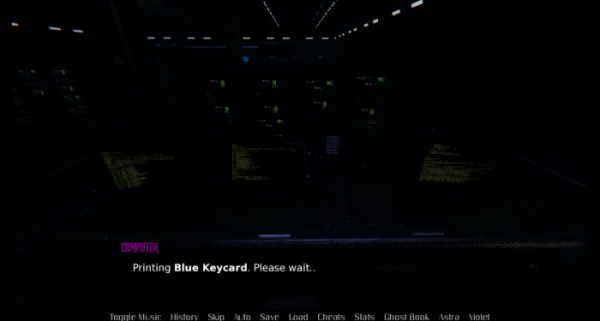
Blue Keycard
This one actually isn’t new, I just never added it because it didn’t do anything at the time, then when it did finally do something, it wasn’t anything that mattered. But that has changed! You can create the Blue Keycard by first finding the White Keycard, then returning to the room where you may or may not have raped Leo’s unconscious body. Now turn right, go forward, turn left, and forward again (→↑←↑), and you’ll find a terminal. Access the terminal and use the Material Printer to print out your Blue Keycard. Now you can turn off the vents. Also I forgot if you’re asked for a password here if it’s your first time accessing the terminal but I think the password is like “boobs” or something.
Scene Progression – Phasmohentaia Walkthrough & Guide
Honestly, once you’ve gathered all of the items you can really discover everything else on your own. “But I must coom”, you say, being a coombrain. Very well, here’s a pretty vague overview of the masturbatory content in the main story. Each update, new content since the last update will be highlighted in yellow.
Companions
The Spirit
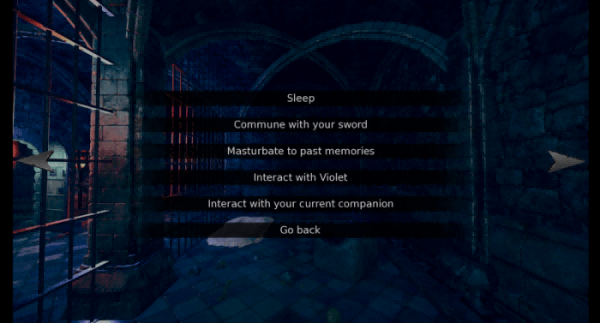
- You can replay her cowgirl scene by going to bed and selecting “Masturbate to past memories” while on her route.
- To access the Spirit’s sex scenes, you first have to get her to talk. Heeeere’s how:
- Interact with your Current Companion
- Let’s Talk
- Is there a way we can communicate?
- (You’ll be suggested to ask someone who might know about the Spirit)
- Talk to Shortstack
- Rest
- Communicate with Companion
- Let’s Talk
- Try talking to her again, but slowly
- When in doubt, use your D
- You’ll get a scene with the Spirit and Shortstack, provided you have 10 love with Shortstack.
- Sleep
- Communicate with Companion
- Let’s Talk
- I think Shortstack is upset (or something)
- Talk to Shortstack
- (Tada, now the Spirit can possess Shortstack)
- Sleep (maybe)
- Communicate with Companion
- Let’s Talk
- Possess Shortstack
- Talk to the Spirit (or something. The first option)
- I think we should take our relationship to the next level (or something)
- Now, when you interact with your companion and say “Let’s Fk”, you have Oral, Vaginal, and Anal sex options.
- You unlock anal sex with the Spirit by exploring her additional dialogue options on Friday (in-game date).
- Communicate with Companion
- Let’s Talk
- You seem different today
- Possess Shortstack
- Why are you so different right now?
- How old are you? (maybe. Just do it anyway)
- What happened to you the night you were caught?
- Now you can have anal sex with her.
- You can have a threesome with The Spirit and Violet (The Slime) if you have both of them unlocked. Simply select this option from the “Wanna Fk?” menu. If you don’t see that option then I don’t know what to tell you. Maybe you need Black Violet.
- If you go to The Cellar (go downstairs instead of upstairs when heading to Tigarah’s area), you can have The Spirit use a strap-on on you if you approach the…stockade? I don’t know what the Fk it’s called. It’s pretty obvious though so you can find it.
The Succubus
- You can replay all of the Succubus’ scenes from the prologue by going to bed and selecting “Masturbate to past memories” while on her route.
- By selecting “Interact with your current companion” (from the bed in your cell), you can simply select “Wanna Fk?” to gain access to more sex scenes.
- Again, from the bed in your cell, if you select:
- “Interact with your current companion”
- “Let’s talk”
- “How about some conversation”
- “I want to know about you”
- “Tell me about yourself”
- (You’ll end up back on the previous menu)
- “I want to know about you”
- “Why are you helping me?”.
- Now, “Wanna Fk?” has a futa variant for “Cowgirl” and “Fk her ass” positions.
- You can have a threesome with The Succubus and Violet (The Slime) if you have both of them unlocked. Simply select this option from the “Wanna Fk?” menu. If you don’t see that option then I don’t know what to tell you. Maybe you need Black Violet.
- Similarly to The Spirit, The Succubus also has a scene in The Cellar (refer to The Spirit’s post about where this is), where she’ll grow a D and rail you.
The Slime
First of all, where is the Slime? Starting from the starting area (you know, that picture I posted like 6 times in the item guide), go right three times until you see what looks like a sewer vent. To actually venture into the vent, you will need the ladder (see item guide).

- Anywho, when you first enter the vent and proceed forward (and move closer to her), you’ll get a few scenes.
- Return to the sewer vent thing at any point to freely select scene options, and feed the goo your goo.
- On The Station, if you still have The Slime and she’s strong enough (maybe, I don’t know), you can get a…tailjob and a…tail…BJ(???) from her disembodied head.
- Once you get The Slime to Power Level 4, talking to her while in the bed of The Station will allow her to digivolve to…Black The Slime. Not racist, just an observation. With this transformation, you can use the “Violet” button at the bottom of your screen, then “Talk and Romance”. Now you can make sweet sweet love to your melanated amorphous blob.
- As of v0.3.6.6 she can now take your black cherry. Enjoy!
The Demon
As of v0.4, you can continue your journey with The Demon, Devos. If your anus wasn’t loose before, it certainly will be in the near future. Granted, you do have the option of resisting Devos at every turn, in which case, why the Fk did you choose this route?
- If you try to resist Devos after getting chained in The Cellar (I guess), you’ll get cornholed.
- If you try to resist twice you’ll get faceFked. See what happens when you resist? This says a lot about our society. Or something.
- You can repeat these scenes by going back to The Cellar and interacting with the sex dungeon-looking stuff in there.
- If you’ve managed to get 40 Loyalty without following through with wanting to kill yourself, you can have a threesome with Devos and The Clown, who also has an actual name. Naturally, this route being what it is, you’ll be taking D from both ends.
Side/Hidden/Other Characters
The Statue
- When retrieving the black gem, instead of attempting to smash her hand like a Fking psycho, you can eat her out instead. (Requires hammer to access scene)
- Once you retrieve the Gem, the statue will appear in Tigarah’s area. Once you walk around the entire area and examine the portal, then try to open Tigarah’s room door, the Statue will have disappeared and will become an Entity that hunts you. If you ever lose to her, she’ll rape you.
Shortstack
- On the (Lie/Slave) route, you can immediately get a BJ from Shortstack. On the (Trust/Romance) route, having 5 or higher love with her will enable BJs upon request.
- On the (Trust/Romance) route, having 15 love or higher with her will enable you to have sex with her upon request. You can also get her pregnant this way, if pregnancy is enabled.
- On the Spirit route, you can have possession-sex with her by doing the following:
- Interact with your Current Companion
- Let’s Talk
- Is there a way we can communicate?
- (You’ll be suggested to ask someone who might know about the Spirit)
- Talk to Shortstack
- Rest
- Communicate with Companion
- Let’s Talk
- Try talking to her again, but slowly
- You’ll get a scene with the Spirit and Shortstack, provided you have 10 love with Shortstack.
The Nurse
- If you have the glowstick, when retrieving the ladder (see item guide) you can fondle her ample bosom as much as you like.
- Once you get the ladder and she is no longer in the room you got the ladder from, she becomes an entity that can hunt you. If you sneak up behind her and “attack”, you can D her down.
- Alternatively, if you lose to her or “surrender”, she’ll ride you.
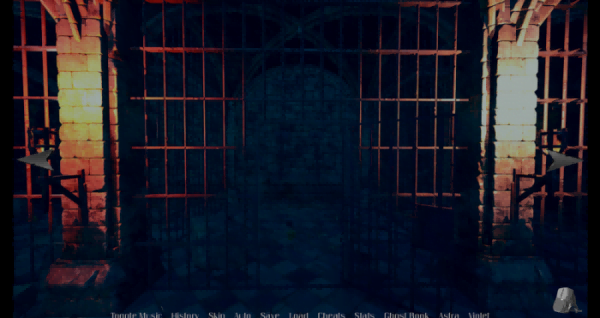
The Zombie
The Zombie is an Entity that hunts you in the game. Her area is the one with all the rubble and gated spiral staircase, through the red door.
- If you sneak up behind her, you can force her into submission. With your D, obviously.
- If she knocks you down, then she’ll ride you, Amazon style.
The Clown
The Clown can primarily be found on the path through the portal on the way to where you originally spotted the Nurse. She can also pop up pretty much wherever, randomly. You can’t sneak attack her or use items against her successfully. Attempting either results in you getting bonked…with a wired baseball bat. Two hits and you’re knocked down.
- If you attempt to use an item in battle against her twice, she’ll knock you down and ride your face.
- If you force her off of you while she’s riding your face, you can Fk her, with optional futa content. (You can’t force her off if you surrender)
- As of v0.3.5.4.1, if you surrender to her, she rails your boyhole.
- If you give her a red balloon, she’ll give you a BJ.
The Dragon
The Dragon is part of the main questline, so you’ll end up finding and fighting her naturally. She isn’t an entity, but she does have multiple scenes and you can fight her multiple times. She also has futa-variant scenes if enabled.
- If you win against her in combat (after the first time you beat her), you have the option to dominate her.
- If you lose against her in combat, she’ll ride you…dominantly. With her draconic anus. (You can also just let her dominate you using the “romance” option mentioned below.
- If you romance her after having previously dominated her, you’ll have the option to passionately kiss her, like the filthy degenerate you are.
Tigarah
Tigarah can be found in her room in The Temple, and offers main story quests in order to share a bed with her. Once you’re given the privilege of getting her in the sheets, you’re given several options for sexual congress.
- After finishing all of Tigarah’s quests, choose the “Let’s talk about that reward” (or something) option in her Talk menu, then choose any of the five options that tickle your fancy. You can do multiple options in one session, provided your balls are full enough.
The Plant (I guess)
Regardless of whether you choose to tell Tiagarah about the seed you were given by Rhea, you will ultimately have the option to plant the seed, after infusing it with Good/Evil energy and d-d-d-dunking it in the healing pool. If you give the seed to Tigarah, she’ll purify it for you, whatever that means. I don’t know if there’s any difference between Purified/Non-Purified or Good/Evil infusion before you ultimately plant the seed. Anywho, once planted, go to sleep, then check up on it. Nut on it a total of 10 times (keep nutting and sleeping), and it’ll grow into a…bigger plant I guess.
- Once she’s a big gurl, you can get her to give you a really upsetting-looking BJ. No, really, check it out. Look me in the eyes and tell me you didn’t become uncomfortable.
Leo
Leo is a catboi whose pronouns keep changing from “him” to “their” for some reason. I might just be ignorant. Anywho, (currently) he doesn’t have a set location, but his “area” is The Station.
- When you first enter The Station, and discover Leo’s unconscious body, you can give him the ol’ Prison Shower Treatment if you have 20 corruption. Hey look, corruption has a purpose now!
- Alternatively, once you’ve checked his body once and have inserted the power core into the station, after you “obtain” Astra and Violet (after going to sleep), you’ll notice that Leo is gone when you check the room he was unconscious in. He should now be in the room you slept in after acquiring Astra (make sure you actually see that he’s missing from the previous room first).
- Now, after a healthy bout of exposition you can open Leo’s romance window and keep spamming various options until you unlock additional options. You know how this works at this point.
- Once you’ve unlocked Unit 01, you can have a threesome with Leo and Unit 01. You’ll be on the receiving end of Ds, good buddy.
Astra
Astra is a robutt (hue) who is normally found in The Temple, but (currently) has no scenes in The Temple, but does have scene(s) on The Station, which doesn’t take too terribly much guesswork (for now), and she’ll become much easier to find! Forever. Tentatively. If you pull up her menu and talk to her about “Conversation & Romance” then “Sex and Romance”, she has some sex stuff you can do with her.
Sera
Sera is an elderly (older) angel who works as a maid for her terrible hate crimes or something. You find her imprisoned on The Island for doing an accurate R. Kelly impression on an unsuspecting sand castle. The age of the sand castle is never specified. Anywho, once you rescue her, you can do quests for her in The Temple in order to raise her affection enough for her to “please god just touch the tip that’s all I’m begging you”. Not an exact quote but you go through a lot of bullshit for just that.
- If you raise Sera’s affection to 25, she’ll give you a handjob (with a lil’ kiss on the tip). You can get her affection to 25 by doing 5 quests.
- If you raise her affection to 45, you can D her down after dusting her for cobwebs, amirite fellas? That’s 9 quests. I’m really good at math.
- “Gosh, Plank, that’s tedious as Fk”. Ye, so if you get 25 corruption instead, you can “Play a trick” on her then give her the ol’ “struggle snuggle”. Merry Christmas!
The Shade
The Shade can be found in the same area as The Zombie, which I refer to as the Red Door Area. I’d say the chances of getting her or The Zombie as opponents in combat is about even.
- If you fail to run from her (even once), you’ll get raped.
- If you sneak up on her you can pack her colon.
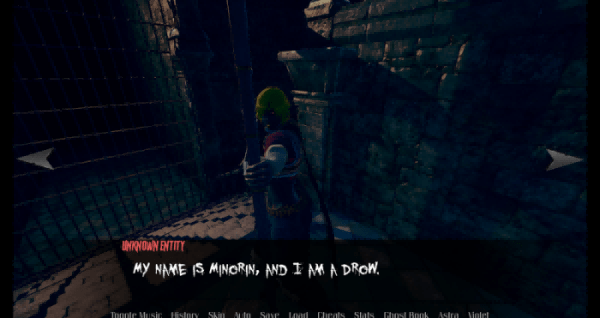
The Drow
I personally don’t know where to find The Drow with 100% certainty, but I think if you just keep entering and exiting the Red Door Area you’ll run into him eventually. I also don’t know if you have to unlock your Sword Aspect before fighting him, but you may as well just go ahead and do that by referring to the “Sword Aspect” section.
- If you beat him in combat as MC you can have him give you a BJ.
- Alternatively, you can pin him down (up, really, it’s an interesting hold to be sure) and give him the ol’ D enema.
- On the other hand, if you lose, you have the option of giving him one or your items or surrendering your black cherry.
The Doll
The Doll can be found in The Temple (initially), sitting next to that row of three statues in the…hallway. You can interact with her by checking out her spiffy new Jordans.
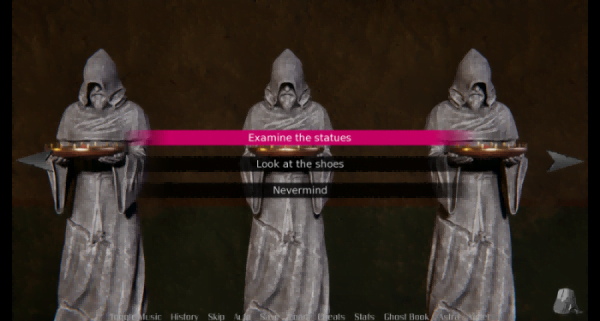
Sometimes, when you check on her, she’ll be looking at you, which, who wants to Fk someone while making eye contact, right? Fking creep. However, if she’s not looking at you, you can “Check” her, and have your very own Real Doll.
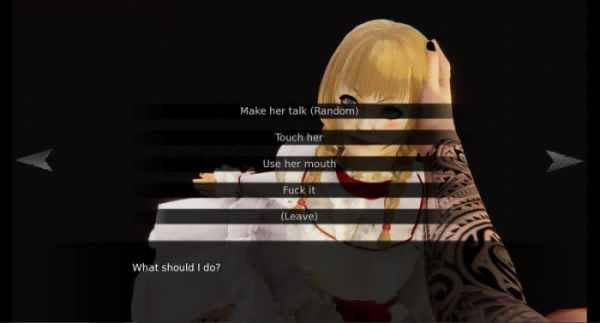
If you don’t see all of the above options just keep diddling her until you’ve unlocked them all. Also allegedly she curses you or something but I haven’t seen it, so.
The Sword
Now, I know what you’re thinking, “My mommy told me not to Fk swords”. While that may be true, have you ever stopped to think maybe she just wanted all the sword sex to herself? She’s selfish. That’s why your dad left. Anywho, once you unlock your sword’s “Aspect”, you can now go to your cell bed and “commune” with it.
The first time you do this, there’ll be some exposition, which, I’m sure that’s not why you’re here. More importantly, after naming your sword, as one does, you can now choose its gender, as one also does.
Now, as I’m sure you’re aware, the literal only reason to give a sword a body is to take it to the Bone Zone. Which, now you can! You know the drill by now. There’s a “Romance” option now when you talk to your sword. Go see what your mother was keeping from you.
The Frog
Somehow the French always manage to croissant their way into everything. When assisting Leo in his quest for seafood, you’ll come across The Frog, who will give you a quest of her own. Once completing, you can unlock her “Romance” option and Du Omelette her Fromage.
The Chocolate Succubus
I actually used the term “Black Succubus” for this section initially until I realized that’s not what she was referred to as in the patch notes. Anyway! You can find The Black Succubus by randomly Ding around in The Swamp.
- If you “sneak up” behind her you can skip straight to the sex. Well, she’ll dance and shit first but ultimately, yes, you make the sex with her, my friend.
- If you choose to fight her, at some point she’ll overpower you with lust and will ride your face. If you “Try to regain control” after she Fking waterboards you, you’ll resume fighting.
- If you surrender to her or fail to run away she’ll ride you until your balls are completely empty, but won’t kill you.
The Android (Unit 01)
You can find Unit 01 in The Station by collecting all of her body parts then going to the area past the vents you need the Blue Keycard to shut off. Once you’ve assembled her, you’ll need to go back to the same console you used to turn the vents off to activate her. I believe in your ability to revisit places you’ve already been to and interacted with without additional assistance.
Unit 01 has an Alignment System, where her words and actions will differ depending on what types of shit you’re loading her head with. She needs to be either Angelic Good or Demonic Evil to “romance”. You can always swing her alignment either way so feel free to test out both personality types. Go back to your bed in The Castle to interact with her (Side Companions menu), and talk to her about either “Humanity” (Good) or “War” (Evil).
Once she’s at either extreme, you’ll be able to D her down, with an optional futa toggle if you so desire. Currently, Angelic Good gives her a more shy temperament while Demonic Evil turns her into some manner of masochist sexual deviant.
The Witch
Similarly to Sera, you need like, “thresholds” of romance points in order to unlock the lewd scenes with her. I don’t know what those thresholds are because doing Sera’s quests repeatedly was like an out of body experience for me because I was overwhelmed by an intense desire to kill myself the entire time. So you, brave soldier, will have to just keep doing quests until you figure out how many points you need for each thing. On the bright side, I believe in you.
- Allegedly, you’ll have the option to have her perform from behind on you at some threshold.
- Allegedly, you’ll have the option to have her ride you cowgirl at some threshold.
- Allegedly, you’ll have the option to have her glaze your donut at some threshold.
The Barkeep
If you want to pay your respects to the elderly, you can Fk The Barkeep for 50 Gold and 200 Gold. For 50g, she’ll give you a BJ. I’m sure there’s an actual term for it, but I don’t know what it is. For 200g you bang her behind the counter.
The Mechanic
This squirrel girl can be found at The Docks (to the left of the dock itself, opposite the elf who looks eerily like Belle Delphine), which I’m sure you’ve wandered into by accident while trying to find anything else in this confusing ass city. If you’ve managed to magically procure 400 gold and bought some rope (200g) and duct tape (200g) from that shopkeeper you bought clothes from, you can sodomize this unsuspecting squirrel after attempting to talk to her initially. Think about that for a minute. 400g to rape a squirrel? Back in my day we used to rape squirrels for free.
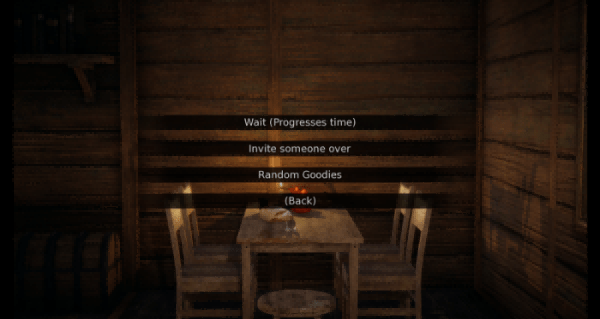
Your Room
When you make it to The Elven City, after some exposition and having an audience with The Queen, you’ll be given a room that you can sleep in and whatnot. As kings, you and I know that sleeping alone is for sad and lonely virgins. Chads like us always have a big bara daddy to dom us into the night, so if you head over to the table with the hardest looking bread in the world on it, you’ll be able to invite most of the characters you’ve met throughout the game to sleep with you. Like, actually literally sleeping in the bed with you. The reason this is in the “Scene Progression” section is because there’s a sex scene for each (mostly) person you can invite. I’m not going to list them all here because it’s literally (almost) everyone you’ve met in the game up to this point.
Mechanics – Phasmohentaia Walkthrough & Guide
There are a number of systems and mechanics in Phasmohentaia that you might benefit from having a good understanding of. Unfortunately for you, I’m not the person who could best explain them. Oh well. Here they are.
Affection System – Phasmohentaia Walkthrough & Guide
If you open the “Stats” menu, you’ll notice that many characters/companions have a “Love” stat, which typically increases by laying pipe on the character in question, but not always. For some characters, scenes and conversations are gated by this stat. This section won’t really tell you what those gates are (but the Scene Progression section will), so just keep farming until whoever you’re talking to consents to getting their mudhole creampied.
Companions
The Succubus
It should come as no surprise that the way you raise the Succubus’ affection is by having sex with her. The more sex you have with her, the more she’ll like you. What may surprise you, is that not having sex with her all day will cause her to lose favor with you. Something like 1 Love a day or something.
The Spirit
Think that having sex with the Spirit increases her affection toward you? Surprise! You’re wrong. You can’t even have sex with her in the main story until you do a chain of events in the story (check the scene progression guide). In the prologue, being nice in general will increase the Spirit’s affection toward you. In the main story, listening to her wordless suggestions (not smashing the Statue’s hand) will also increase her affection. Finally, romancing her in the main story (literally select the “Romance” option) will increase her affection toward you, until 10, where you have to take your relationship to the next level to increase it further Something you may want to note is that until you take your relationship to the next level, the Spirit’s Love will decrease by 1 every day..
The Demon
Unlike other entities that increase romance based on how many times you Fk them, your loyalty to Devos increases based on how many times he has Fked you. There’s also the suggestion that your loyalty to him also increases based on how many corrupt things you do, but after a vicious raping spree of anything I could get my rapist hands on, the increase in loyalty was either negligible or nonexistent (I wasn’t really keeping track) so you’re honestly better off getting Fked, or else you’ll still be getting Fked, but in a different way.
The Slime
Like many iterations of slimes you’ve seen in life, the Slime needs to “eat” pretty much constantly to sustain herself. She has hunger levels, ranging from Starving to Full, which, of course, dictates how hungry she is. Naturally, you feed her semen until she is satisfied, which in turn raises her Love and hunger level. Additionally, the Slime also has a Power Level (currently capped at 3), which determines what abilities she can use in and outside of battle. Similarly to every living creature you’ve ever met, her hunger will grow over time.
Side/Hidden/Other Characters
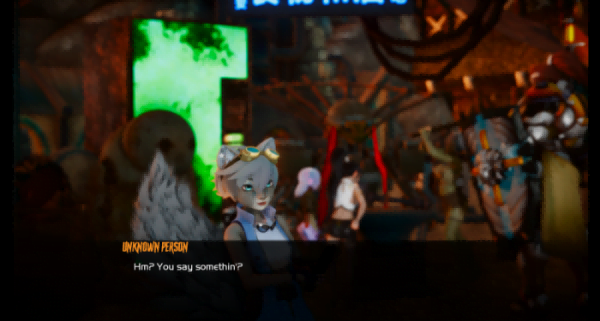
Shortstack
A goblin? Time to raise her affection with your D, right? NOPE (yes). Regardless of whether you choose the Slave or Love route for Shortstack, the way you raise her affection is by patting her head like a filthy degenerate. You can only do this once a day. Fortunately, once you unlock BJs (5 Love for Romance route, immediately for Slave route), you can gain affection that way as well. At 15 Love, you can have sex with her, which, naturally, will raise her affection as well. Amongst other things.
The Statue
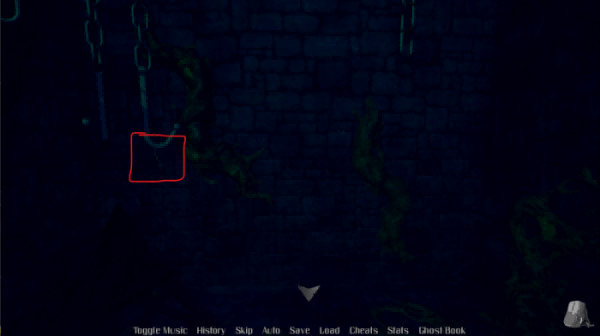
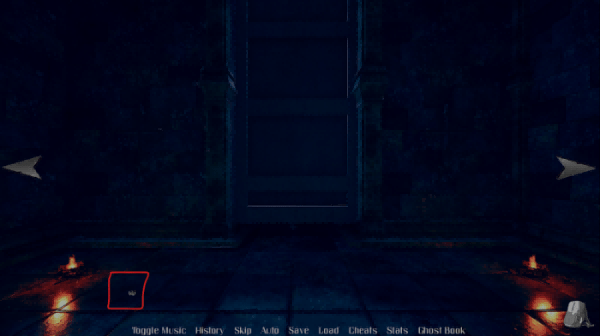
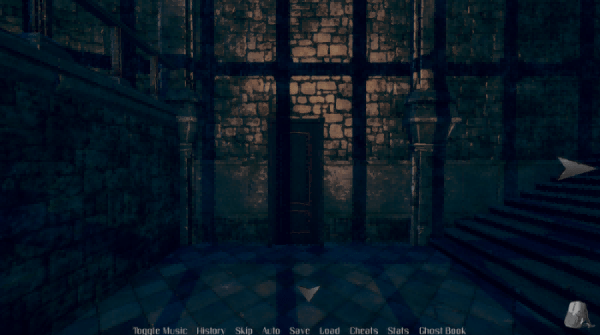
A really good first step in raising affection with the Statue is not smashing her Fking hand with a hammer. When she becomes an Entity that hunts you, you can raise her “Romance” stat by giving her gifts. Specifically, a flower bracelet that can be found in the Zombie area (rubble, gated stairs, through the red door, etc). If you proceed to the “back” of that area, you’ll reach a currently impassable door, where you can find the flower bracelet, pictured below. The bracelet respawns each time you give it to her.

The Nurse
Similarly to the Statue, the Nurse can also receive gifts. Two, specifically, the bloody hammer and the glowstick. By the time you encounter her you won’t need them anymore. If you’re a hoarder, you can also gain affection with the Nurse by attempting to romance her when you sneak up on her. This involves hugging and ultimately kissing her (once she’s good and ready. Take it slow, Romeo).
The Clown
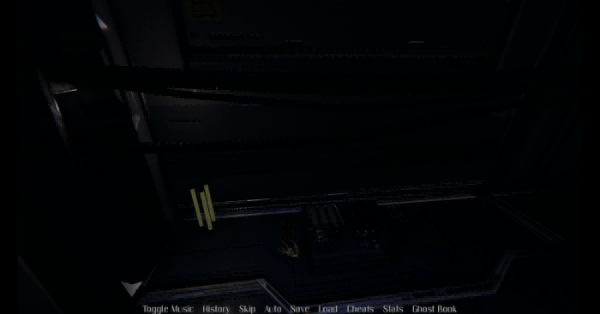
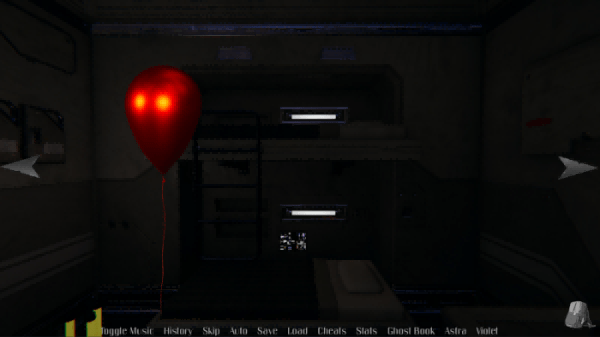
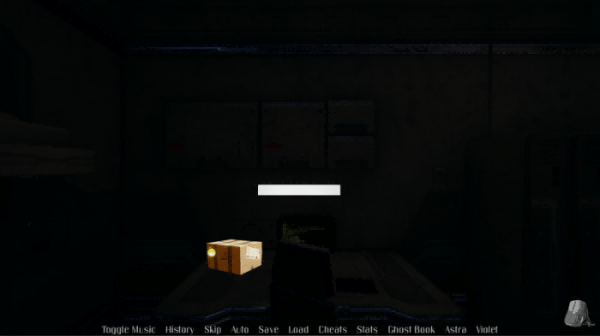
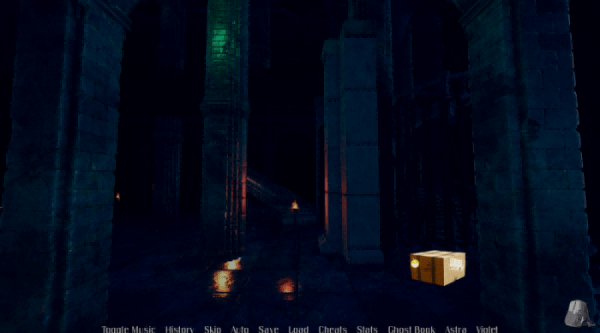
As of v0.3.5.4, there are two ways to gain romance with the clown. The first is to let her ride your face to completion, like the sorry soyboy you are, while the other is to find a red balloon in various areas of various maps and gift it to her when she pops up to rape your face. “Hearts, stars, horseshoes, clovers and blue moons. Pots of golden rainbows, where’s the red balloon?”, you might be wondering. My understanding is they’re…around, at a ⅓ chance of appearing. The easiest red balloon to “spawn farm” is actually across the room where Leo takes permanent residence (exit Leo’s room, turn left, move forward, turn right, enter the door) in The Station, seen below. Just keep exiting and re-entering the room until you find it.
The Zombie
Interestingly enough, the Zombie actually has two stats to note. Intelligence, which is gained by you giving her a delicious creampie, and Romance, which is gained by you hugging her from behind like some manner of disgusting animal. Both “sneak attacks” and getting raped will raise her Intelligence, but you can only Romance her by sneaking up on her.
Sera
While “technically” a milf because she’s supposed to be older or something, Sera looks young enough for you to not have to be into milfs in order to find her attractive. It sounds like a bunch of rambling nonsense because it is. Anyway, you can raise Sera’s romance stat by doing quests for her, in which she will accompany you until their completion The quests you’ll be assigned will be assigned at random because Fk you, but each quest completion raise Sera’s romance by 5 points. Do you feel that pain? That pain in your ass? “Lol”, said the Scorpion, “Lmao”.
The Witch
The Witch has the same romance mechanics as Sera, in that you have to do repeatable quests in order to grind relationship points with her.
Hunting System – Phasmohentaia Walkthrough & Guide
As you progress through the story, you will free and occasionally anger the Entities you encounter along the way. Some of the Entities will begin to hunt you down like the Naughty Nelly you are. The way the Hunting System works is that each Entity has their own little area that they spawn in exclusively. Each time you take a step forward or change direction, there’s a chance that an Entity will appear. Generally, whether the Entity appears facing towards or away from you is up to chance (50/50).
If the Entity is facing away from you, you can either run away with a 100% success rate, or you can perform a “sneak attack” on them, generally with a 100% success rate, which is essentially an auto-win where you Fk them into submission.
If the Entity is facing toward you, you can still try to run away, but there’s a chance to fail. If you fail twice you get raped. Alternatively, you can attempt to throw hands, which will lead into the battle system. In battle, you can either try to run, again, you little bitch, or you can attempt to defeat the Entity. Defeating the Entity comes in the form of using your Companion’s abilities, or using an item that’s effective against that specific Entity. You can also surrender. Speaking of which, if you get raped by an Entity while your balls are empty, you’ll die. Game Over.
Companion Abilities
When they work, Companion Abilities will instantly win an encounter and allow you to proceed. The caveat is that each Companion can only use their ability 3 times a day, and you have to sleep to recharge them. Also, there are nuances to each ability that dictates who/what they’re effective against. Currently, each Companion only has one ability. This may change in the future, maybe.
The Succubus
Ability: Seduce (or something)
Ineffective Against: Magical Entities, Robots, and Vampires
The Spirit
Ability: Possession (or something)
Ineffective Against: …The Statue, at the very least.
The Slime
Ability: Tentacle Attack (or something)
Ineffective Against: Dunno. Ghosts, probably.
The Protagonist
Ability: Slash (It’s a Fking sword)
Ineffective Against: The Statue, currently. (It’s a Fking statue)
The Android
Ability: Jager (with a funny looking “a”) Cannon and Missile Barrage
Ineffective Against: You have like 4 companions at this point you don’t give a shit.
Entities – Phasmohentaia Walkthrough & Guide
Despite everything I just said about the Hunting System, Entities themselves are actually fairly unique comparatively. Each Entity has strengths (eh) and weaknesses (ye) based on their race/species. This diversity will only further…diversify as the game progresses.
The Statue
Species: Magical
Weaknesses: Looking at her (lol), The Mirror, Physical Attacks
Strengths: Resists magic-based attacks
Location: Tigarah’s Area
The Statue is interesting for a couple of reasons. The first is that it is impossible to sneak up on her, because her entire basis of movement revolves around you not looking at her. Meaning, you can’t “sneak attack” the Statue. Furthermore, there’s a constant timer running while you fight her. Every 10 (I think) seconds, you’ll be forced to blink, and she’ll move closer to you. If she gets close enough to you, you can’t run away, and if she gets even closer than that, you’ll get raped.
Additionally, as you’re searching Tigarah’s area, a timer may randomly appear, as the Statue can instantly defeat you if you stand in one area for too long (only once the timer appears). She’s resistant to magic-based attacks, meaning the Succubus and the Spirit can’t harm her, but the Slime can. You can also use an item, the Mirror, to defeat her.
If you have a Flower Bracelet, you can Romance her with it, and avoid fighting her. Alternatively, you have a 100% chance to run away from her at all times, provided she isn’t too close to you, because she’s a Fking statue.
The Zombie
Species: Undead, obviously.
Weaknesses: Holy Water, Magical/Physical Attacks
Strengths: N/A
Location: Red Door Area
The Zombie is probably one of the most straight-forward Entities, as far as fighting goes. Yes, her intelligence increases when you Fk her, but she can be one-shotted by every Companion Ability (so far) and has no “special” mechanics that I’m aware of.
The Nurse
Species: Ghost (Can be found under “Bobblehead” entry)
Weaknesses: Crucifix, Magical/Physical Attacks
Strengths: N/A
Area: The Castle Halls
Another fairly straightforward Entity. Although technically a Ghost (allegedly), the Nurse can be harmed by all manner of Magical/Physical attacks.Yup…that’s pretty much it.
The Clown
Species: Unknown
Weaknesses: Unknown (not really)
Strengths: Unknown (lol get Fked)
Area: Unknown
“Lol go Fk yourself”, says the Clown. Like the Statue, the Clown is a pretty unique Entity. First off, you can’t “sneak attack” the Clown. Yes, you can sneak up on her, but if you attempt to attack her, she’ll kneecap you with a barbed wire baseball bat. You may be wondering what item she’s weak to. Well, if you try to find out, she’ll kneecap you with a barbed wire baseball bat. You may also be wondering where she appears. Everywhere. Yes, no matter where you are, the Clown may appear and attack you. Furthermore, she is the only Entity (currently) that can attack you mid-transition while you’re moving from point A to point B. But wait, there’s more! The Clown can attack you immediately after you successfully run away from another Entity, because Fk you.
Naturally, if you attempt to run from her and fail, she’ll, yes, kneecap you with a barbed wire baseball bat. Finally, to add insult to injury, the Clown can’t grant you a Game Over because she’s also the only Entity (currently) that doesn’t touch your D at all. She rides your face to completion then blueballs you, again, because Fk you. Fortunately, she’s weak to all manner of Companion abilities.
The Shade
Species: Undead
Weaknesses: Who cares
Strengths: Shut up
Area: Red Door Area
The Shade is kind of weird in that you only get one chance to run away from her, which may or may not be intentional. If you fail to run away from her once you get raped. While you might think a Shade would be a type of ghost, you’d be wrong, because Violet’s physical attacks do indeed work on her. Naturally, there’s a scene for “sneaking up” on her as well.
The Drow
Species: Knife Eared Fk
Weaknesses: Swords, probably
Strengths: He’s really Fking fast I guess oh my Fking God
Area: The Castle
You meet (or at least I did) The Drow upon leaving the Red Door Area (just go in and out repeatedly, if that doesn’t work then I have literally no idea what triggers this event). After some exposition (kind of, not really), he’ll challenge you to a duel or something, explaining that he’ll come find you or something, except he does the exact opposite by literally never showing up again ever. At some point I got him to spawn again by repeatedly going in and out of the Red Door Area…again. Clarity would be dope. In any case, the fight with The Drow, if you choose to fight him yourself (as the MC) will allow you to use the Combat Techniques menu. More on that later I guess. The Drow is really Fking fast or something, and your regular Strikes will miss like 80% of the time apparently (It’s actually 33% chance to miss at Combat Power 1 but remember that God hates you), so I hope you chose your Weapon Aspect well. Personally, I chose Wind, so none of our hits are hitting each other and this Hell is eternal.
The Chocolate Succubus
Species: Succubus
Weaknesses: …Damage
Strengths: Tanky as Fk
Area: The Swamp
You encounter The Black Succubus in the Swamp pretty regularly. Especially if you stand still and spin in circles. The fight is actually pretty straightforward I guess. You’ll want to make sure you have at least 4 attacks available, because you’ll have to hit her at least four times to knock her down. After two turns, you’ll succumb to your lust which will allow her to ride your face. This won’t actually empty your balls any, so after resisting her you can down her in two more hits. Essentially, if you enter this battle with less than four skill uses (Companion + MC) you’ll have no choice but to surrender and get your balls drained. Fortunately there’s no way (that I know of) to be killed during this encounter.
Items
Your Companions won’t always be able to save you, and that’s where Items come in. Items are found strewn around the Castle in general, and provide advantages toward specific types of Entities.
Christie’s Rosary
Location: Nurse Room
Effective Against: The Nurse
Lost Mirror
Location: The Statue’s Pedestal (In the Castle Halls, once the Statue is gone)
Effective Against: The Statue, Ugly People
Holy Water
Location: Random
Effective Against: The Zombie
Flower Bracelet
Location: Red Door Area (Opposite the entrance of the area)
Effective Against: The Statue (Give as a gift)
Protagonist Combat
Systems
I don’t know if this will be a recurring feature, but I do know that it makes me want to kill myself. Fighting as The Protagonist against The Dragon consists of a Rock, Paper, Scissors-style battle, in which you choose from a Passive, Aggressive, or Defensive stance. I won’t go into detail beyond that because it really doesn’t matter…as of writing.
Assumedly, the npc (The Dragon, in this case), has an equal chance of choosing whatever stance, so in theory you could just spam the same stance repeatedly and have a 33% chance of hitting the opponent, a 33% chance of getting hit, and a 33% chance of a draw. In practice, however, you have to remember that God hates you, so save before combat, and be prepared to reload the save repeatedly.
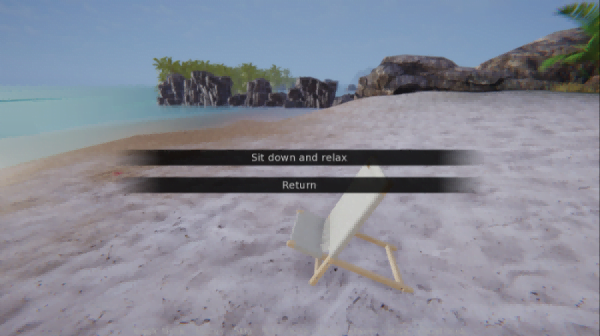
Recovery
Did RNJesus not smile upon you this day? Do not worry, you can easily restore your health by going to the nearby beach and relaxing. Yes, that’s what the chair you’ve been spamming before even getting introduced to combat does.
Surrender
You know what’ll happen, you dirty birdy.
Sword Aspect (Element)
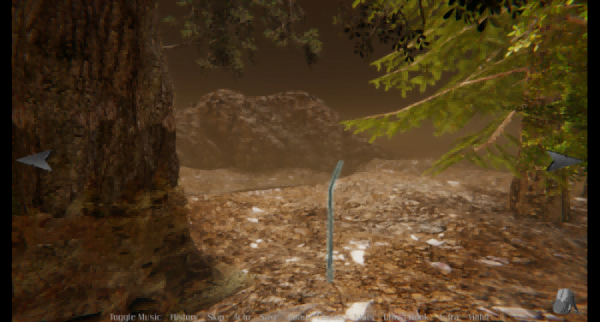
I just like the word “Affinity” better. In any case, at some point, upon leaving The Zombie area (for me, at least, I have literally no idea what procs it), you’ll encounter The Drow, who will challenge you to a fight or something. He has a name. I forgot it.
Before you’re able to fight him, you’ll need to do some preparation by heading back to The Dragon on The Beach and asking her to train you by selecting the “Sword Training” option. After some exposition, you’ll get the opportunity to choose your sword’s element, seen below.
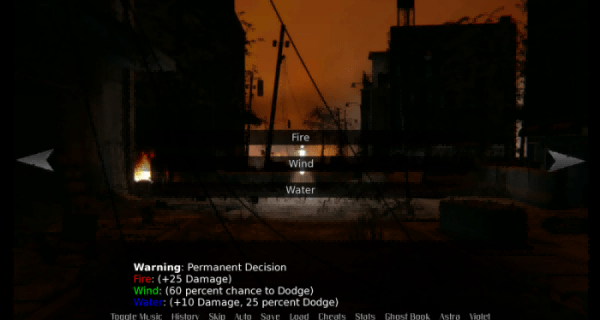
Is there a “best” option? I mean, probably.
Corruption System
You may have noticed that in your “Stats” screen, there’s been a little “Corruption” window since (maybe) v0.1. Currently (as of v0.3.5), Corruption will influence the decisions you’re able to make in certain circumstances, with some of these decisions themselves raising corruption, like a perpetual rape machine. “But how do I raise or lower my corruption?”, you ask. Well, good news! You can now increase or decrease your corruption by utilizing two tomes in The Temple, so hold on to your hat!
Tomes
Purification Tome
The first (or second, depending on which you went to first) tome is the…Purification Tome (not the official name), which will decrease your corruption by 5 points. You can only meditate with this tome once a day.
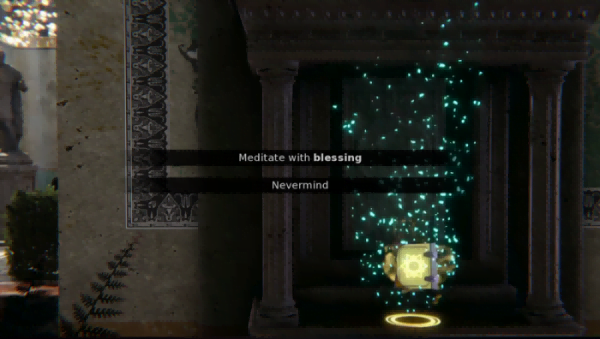
Corruption Tome
The remaining tome is the Corruption Tome (still not official), which will increase your corruption by 5. Similarly to the Purification Tome, you can only meditate with this tome once a day as well.
Your Balls
You, yes you, have a limited number of cumshots per day. To be more exact, 5 instances of blasting rope will leave your balls empty. Empty balls + Entity rape = Game Ogre (someBODY once told me-). Sexual acts that don’t result in you becoming Splooge McFk, won’t drain your balls, naturally, such as getting raped by The Clown. Aside from getting raped, you don’t really have to keep an eye on your balls (haha) because The Protagonist will refuse to Fk anyone/thing while he’s spent.
Ball Recovery
As of writing, there are three areas you can use to fill your balls back up.
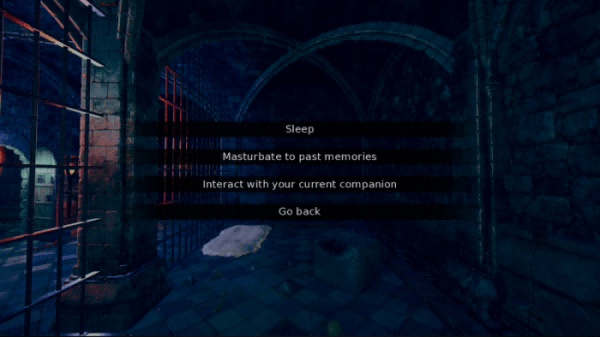
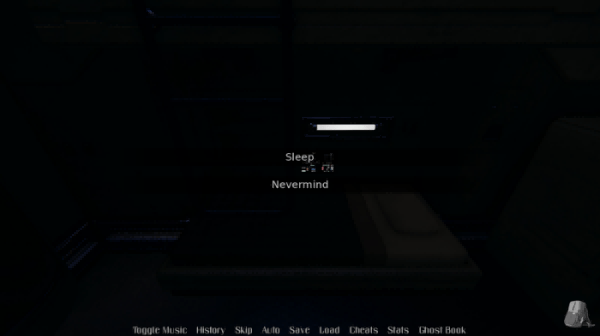
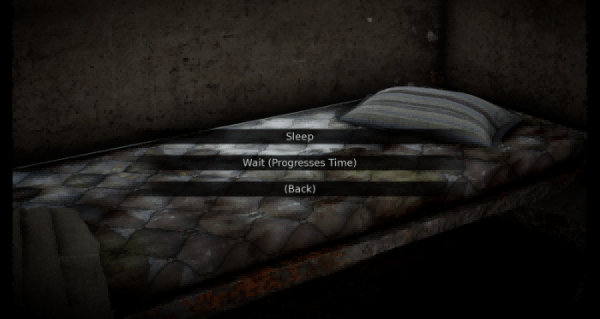
The Cell
Going to sleep in the cell you started the game in will fill the boys back up, but in order to sleep, you can’t have full balls. It’s the kind of thing you tell your naive virginal girlfriend in order to get some nookie before bed.
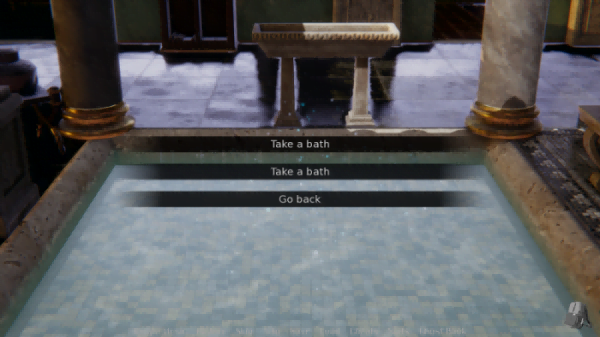
The…Healing…Pool
In The Temple, there’s a pool you can take a dip in, near Astra, which will replenish your ball juices. In order to access this pool, you need to complete Tigarah’s quests…up to the point where she tells you that there’s a pool.
The Station
On The Station, in the second room down the hall before the “In Construction” bit (that doesn’t narrow it down, I know), there’s a bed you can sleep in.
Quest System – Phasmohentaia Walkthrough & Guide
You asked for it! Maybe. I don’t read the forums or chats so I don’t know what you animals have been asking for. Anywho, as of v0.3.5, there is now a Quest System…of sorts. Like all quest systems, this involves getting asked to do a thing, doing that thing, and getting rewarded, probably with some ass. Instead of adding quests to the walkthrough sequentially as they come, I’m going to divide it into who is giving you the quest.
I’m also not going to add any of the quests from before this patch (v0.3.5) because Fk you, but also, because in theory, literally every task you’ve ever done up to this point could be considered a quest, and I’ve already detailed all of that earlier in the walkthrough.
Tigarah – Phasmohentaia Walkthrough & Guide
Finding Nemo (Leo)
When you finally make it to Tigarah’s bedchambers in The Temple, she will ask you to find her little(?) brother, Leo. To start the quest, simply click the obviously marked option “About that job (Quest)”.
She’ll tell you some stuff. You can read. Now leave Tigarah’s room and find the room in The Temple with the statue of Ares in it. Go inside, turn to the right, and there’s Astra. Talk to her and get Leo’s last known location.
Return to The Castle, and go to the area where you encounter the entity, The Zombie. Not the dead magic chick in the room next to Mr. Skellington, but the thicccc dead chick you encounter through the door below.
Now, from the entrance of this area, follow the following directional arrows : ↑↑↑←↑, and there you will find Mr. Cheeks himself. Leo wants you to get rid of The Zombie. More specifically, you have to defeat The Zombie 3 times.
After beating her three times, return to where Leo was, then return to The Temple and ultimately end up talking to Tigarah again. QUEST COMPLETE!
Supplier Search
After finding Leo, Tigarah will immediately give you another errand to run, because she’s a cat and doesn’t care about your feelings, like any cat you’ve ever met. She’ll give you a red gemstone, which you’ll be able to use on the portal right outside The Temple.
After entering the portal, you’ll come across Rhea, Goddess of Fertility, whose quest will be detailed elsewhere. Anyway, come out onto the coastal area of The Beach, then turn left, which is where you’ll find Sera.
She’s old and likes to pee on things for some reason. Ask her about her predicament and she’ll direct you to speak to The Dragon, who can be found on the right side of the coast (literally just turn around and keep going straight).
Talk to The Dragon…twice, and she’ll direct you to a barrel of weapons in which to fight her with. You can access this barrel by returning to where Sera is, and selecting “Look for a sword” from the dialogue options. This will begin some weird sequence because you’re the chosen one or something etc etc. Whichever option you choose probably doesn’t matter at this exact moment in time, but definitely save here Justin Case something happens in the future.
Return to The Dragon and get ready for some fuggin PROTAGONIST COMBAT!!!! Read all about it. Eventually, you’ll win or something, and can now return to Tigarah for your reward. Which, naturally, is sex. QUEST COMPLETE!
Rhea – Phasmohentaia Walkthrough & Guide
Seed of Deception
When you first enter…The Beach, you will meet Rhea, who will give you a seed to plant in The Temple, after infusing it with a blessing, a power (water) source, and soil.
The blessings, of course, are the ones that you get from either the Purification Tome or the Corruption Tome. The “Source of Power” (or whatever) is the Healing Pool you can access once completing Supplier Search. Yes, yes I did just learn you could link to different parts of the same Google Doc. Before you have access to the magic water, you have to decide whether you want to tell Tigarah about the seed, or if you want to attempt to hide it.
I have literally no idea what the difference is between the outcomes of either option. Other than if you attempt to hide it, she’ll still find out, call you dishonest, but let you plant it anyway out of curiosity (killed the cat). If you tell her about the seed, she’ll take it, purify it while you’re bathing, and plant it for you. Anyway, go plant the seed in the soil next to The Temple’s exit, then go to sleep.
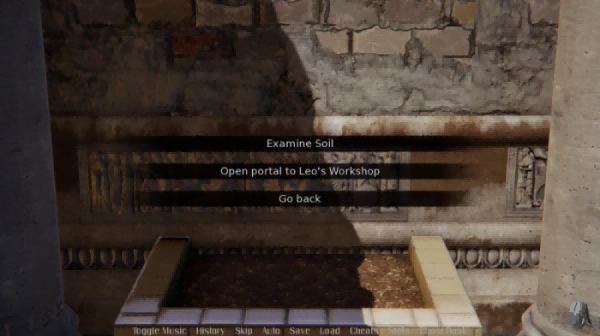
Keep jizzing on it until it grows up (ref The Plant). QUEST COMPLETE!
Sera – Phasmohentaia Walkthrough & Guide
Zombie Cream (not an innuendo)
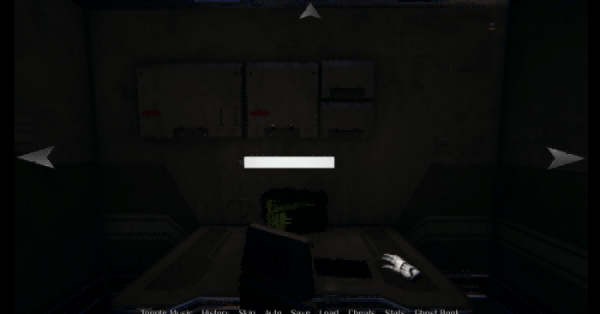
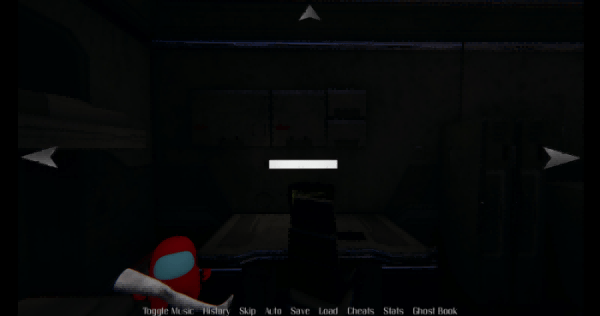
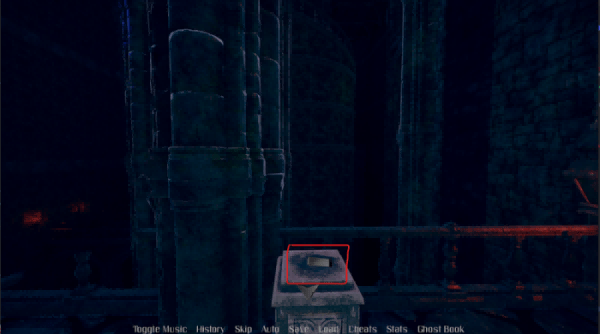
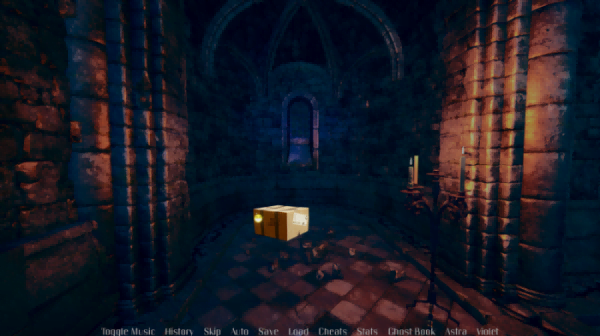
For this quest, Sera will ask you to venture with her to The Station in order to procure a lost shipment of skin cream, specially made for zombies. You’re not meant to understand it. Anywho, go back to The Station and go into the room across from the room that you got whisked to after The Hunter (or something) attacked you. You know, the one where you had that conversation with the computer, before you met Astra…in The Station. The one with multiple computers in it, and those medical sick beds or whatever the Fk in it, remember? Yeah. Then click the box. QUEST COMPLETE!
Ow the Edge
Next, or possibly first because it’s random, Sera will ask you to find a box of knives or some shit on The Beach. Fortunately, this box is right where you first found Sera while she was held prisoner. Click the box. QUEST COMPLETE!
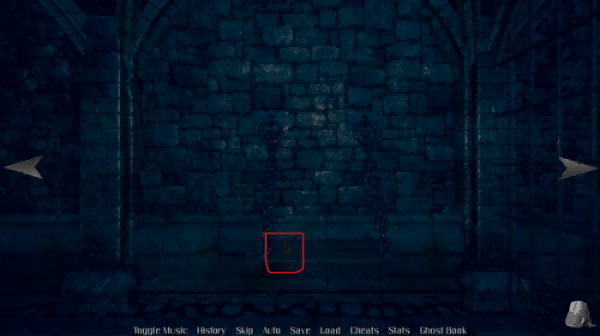
A Box of Bad Luck
For this quest, Sera wants you to venture somewhere where there’s a giant stairwell to get a box of broken mirrors, which is a weird thing to order, but I’m sure there’s some creature that has a keen interest in broken mirrors for whatever reason. Anywho, you can find this box in The Zombie’s area (through the red door), to the right of the gated spiraling staircase…in her area. From that staircase (you know, the one with the gate), turn right, go forward, turn left, go forward, then turn right again. Tada. QUEST COMPLETE!
Clowning for Dummies
Finally, the last (or first) quest Sera will accompany you for will require you to find a book about Pennywise the Clown. If you’ve given The Clown a red balloon, you probably know who ordered this. This one is actually pretty easy to find, as you only need to go to the area near The Slime’s sewer, where you found the lighter, ages ago. If you don’t remember where that is, just go back to the “starting area” (outside of the hallway where the cells are), then turn right twice. Tada. QUEST COMPLETE!
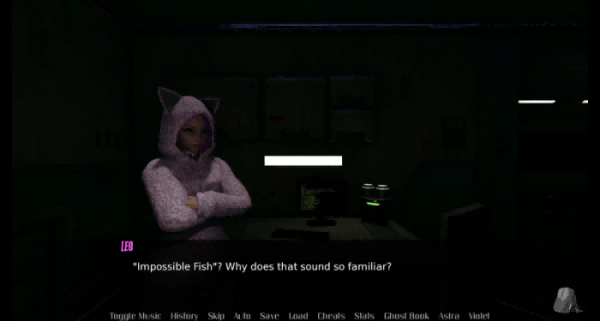
Leo – Phasmohentaia Walkthrough & Guide
Impossible Bussy
Now, as a man of culture, you’ve probably been romancing the shit out of Leo. But oh no, there’s no way to do the “Forced Roleplay” romance option! Aside from that time you literally raped him while he was unconscious. But enough about petty crimes, it’s time to go on a quest! Naturally, this quest begins by going to Leo in and selecting the “Quest” option.
Fish don’t exist in space or something, so now you need to go to Seraphine to ask her where you can get some, although the answer is probably obvious. That’s alright, you didn’t have a fishing rod anyway. The dialogue here is probably different depending on if you Fking raped her or not, so that’s something to keep in mind.
Now head to The Beach. Once you arrive from the portal, go west (left) once, then north (up). If you don’t know your cardinal directions at this point you’re too young to be playing this game. Anywho, now you’re in The Swamp! Watch out for ogres and Smashmouth. Go north, north, east, and north (↑↑→↑) to find a pond that might have fish in it! You’ll meet The…Frog, and gain a new quest objective after a minigame that has no instructions (press space when the indicator is in the green)! Before this quest-within-a-quest begins, you have to actually talk to her again and select the “(Quest)” dialogue option.
She’ll ask you to make her a spear, which will require a branch, a piece of leather, and something sharp. First thing’s first, let’s get the stick. Turn around and go north (→→↑), and you will find a very obvious stick, ripe for the taking.
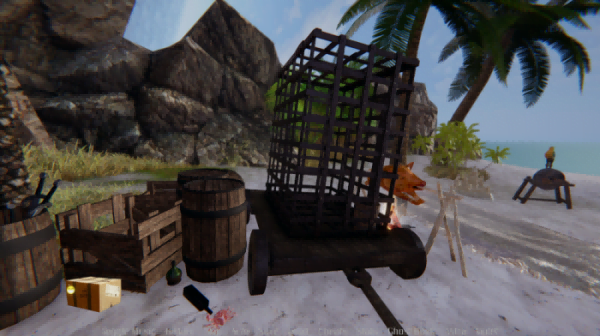
Now head back to the beach, to the cage where you first found Seraphine being punished for watersports. This same location has been used for like 3 quest objectives, so you should be pretty familiar with it. Approach the cage (like actually click the up arrow) and collect your spear tip.

Finally, with all of the other items, go back to The Prison and talk to Shortstack to get your complete spear. (You have to select the “(Quest)” dialogue option twice)
Now head back to The Frog and collect your Fish(?)! Also you can Fk her now, if you’re into French chicks. Take the Fish to Leo and now you can have him roleplay getting raped, which, you’ll learn he’s a Fking terrible actor because he literally doesn’t even pretend to resist or be in any sort of duress. QUEST COMPLETE!
The Queen – Phasmohentaia Walkthrough & Guide
I was going to make a new “The Elven City” section and detail what the Fk you’re supposed to be doing while aimlessly wondering around. But to be completely honest I don’t even really know what you’re supposed to be doing. Instead, I’ll pretend that quests from The Queen start from the time Geralt throws you in jail.
The Plight of Jehovah
As previously mentioned, this quest starts from the time you’re thrown in jail. Literally don’t bother doing anything but sleeping until The Queen shows up. Like, I don’t know if any of the other shit you can do in the cell is impacted by time of day or the noise you make, but at some point I got angry and gave up “exploring”, so you can skip that “getting angry” step and just sleep until exposition happens.
Alright so now you’ll be invited to the throne room. But oh no, you need clothes. Sweet baby Jesus, you’ve finally discovered a place that doesn’t allow nudity. To find clothes, you’ll want to go →↑←↑←, from where the guards are. Like, being completely Fking serious, don’t make any effort to explore, because you’ll get lost. So just immediately follow those instructions the second you’re put back in front of the guards. This part made me want to Fking kill myself.
After buying Old Rags from the shopkeep for a cool 10g, you can now pass the guards. I want you to experience true suffering so I’m going to let you find the guards again on your own. After you pass the guards, just make your way straight (as in go forward twice) to the Throne Room. Once you talk to her, you’ll get a quest to go to The Castle and spread the word of Jehovah.
Make your way back to Spook ‘Em McGookEms in The Castle and try to convert the corpse into a Jehova’s Witness with the copy of The Lighthouse that The Queen gave you. The corpse will frantically escape in a puff of smoke. As a devout Witness, this doesn’t damper your spirits, it only strengthens your faith in your community.
Don’t worry, there’s still one more captive audience member you can try to convert. Remember Shortstack? She’ll have no choice but to listen to your scriptures, so head to her cell, only to discover that she too has escaped. Again, your faith is strengthened. They know not what they are missing out on. Ah well, head back to the Elven City and tell The Queen of your efforts. She’ll reward you by rescuing your fellow devotees in two days. QUEST COMPLETE!
The Witch – Phasmohentaia Walkthrough & Guide
In order to get quests from The Witch, you have to first rescue her by doing the first quest from The Queen. After that, you can find the Arcane Shop in The Slums, which, after passing the guards of The Elven City, should be on your right. Once you meet her for the first time, you’ll get the coveted opportunity to “decide” what her relationship with you is. You know the obvious and most correct choice for deciding what she is to you. That’s right, your Dad.
Sword Searchin’
This wasn’t the quest I got the first time I asked her for a quest so this might be another instance of there being like multiple quests assigned at random that you need to do to grind her romance points up. After my experience with Sera, who in later saves I’d just rape, I’m not doing this shit again. Anywho, this quest asks you to go to The Beach and try to find an Ancient Sword or something. You have an excellent memory, so you remember where that barrel of swords is, right? Great! Go there. Then go back. QUEST COMPLETE!
Seasonal Events – Phasmohentaia Walkthrough & Guide
At the time of writing, I don’t actually know if these events ever go away or not. If you ever check the walkthrough and see that nothing in this section makes sense, well, there’s your answer.
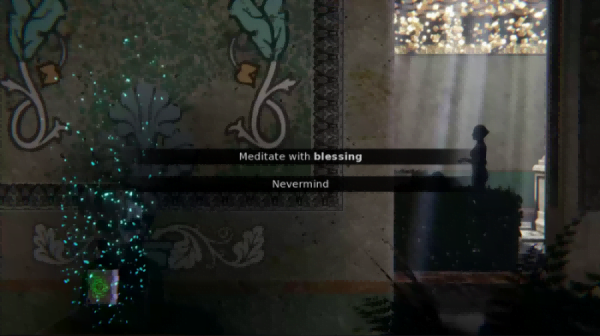
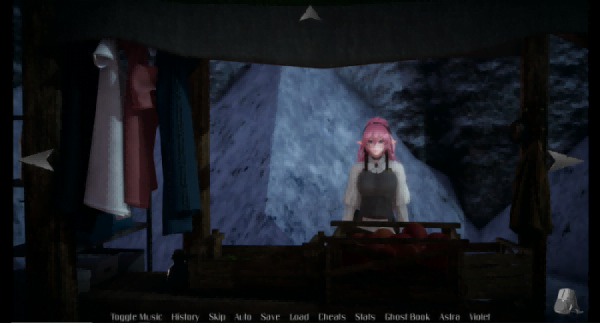
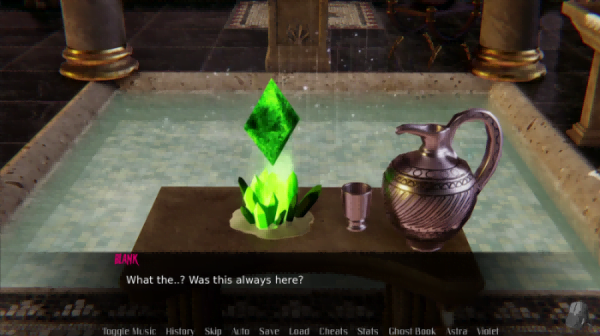
Mary Karisimasu!~
Still here? Cool, cool. The first(?) seasonal event is the Christmas Event, which can be activated by approaching the table in The Temple. Not the huge table where you can upskirt Sera, but the small shitty table in front of the healing pool, seen below. Like, it’s literally the first table you see when entering the room with the statue of…Ares?
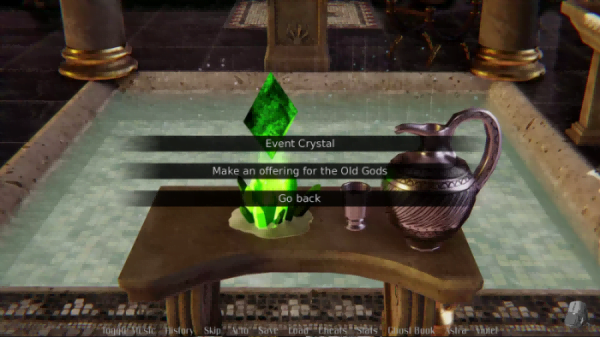
As of writing, the “Make an offering for the Old Gods” option, which sounds ominous as Fk, doesn’t actually do anything, so naturally you’ll be selecting “Event Crystal”. You knew that though because you’re one smart cookie. You’ll then engage in a conversation with Rhea, who you may or may not have previously Fked over, depending on how you handled the “Seed of Deception” (not the official name) quest. Whether you did or didn’t Fk her over probably doesn’t matter, but she’ll present you with some holidays, of which, only Christmas works. Like it’s really not rocket science. None of this was.
Eye Hart U
I think I haven’t been indenting the beginning of every paragraph. It’s going to really bug the shit out of me if I haven’t but we’re at 60+ pages now so…I mean, what am I going to do? This is learned helplessness at its finest, even though it’s totally in my control to do something about it. Right, so, for the Valentine’s event you’re going to basically do the same thing you did for the last quest, in that your first stop is going to be that little table in The Temple.
Being not-stupid, you know to click “Event Crystal” and then “Valentine’s Day”. This will send you to a room that’s full of all sorts of stuff that people probably like to see in a sex-based Valentine’s Day…room. It’s actually not all that kinky, aside from the literal porn playing on the laptop.
Now, here’s where things get tricky. You’re going to be roaming the room for a bit, having absolutely no idea how to progress the scene, because if you leave through the double doors the scene is over. I, still at this point in time, have literally no idea how to proceed with the scene, other than with the literal passage of time.Maybe a certain number of interactions (pressing the up navigation arrow on things). Maybe just spin in circles for 60 seconds. No idea.
Eventually, what’s supposed to happen is that Leo and Shortstack will be teleported into the room and you can choose one of them to take around the room and Fk on various pieces of luxury furniture, or cuddle on the bed if you’re a degenerate. You can only choose one of them but you can repeat the event. So. That’s it. Merry Christmas!
Related Post
- 5 Games Like Treasure of Nadia
- 7 Games like Summertime Saga
- Summer Memories : Cuckolded Girls
- Milky Quest 2
- Living with Temptation
- Living with Temptation 2
- Phasmohentaia
- Hush Hush – Only Your Love Can Save Them
- Kame Paradise 3
- Kame Paradise 2
- Futa Quest
- Fear & Hunger 2
- Devilish Business
- Leisure Suit Larry – Wet Dreams Dry Twice